Welcome to the first Artfulmaths.com blog post! As I know that many of you are keen to use the resources for Summer term enrichment, I thought a useful starting point would be for me to talk through how I have run mathematical art enrichment sessions in the past.
I’ve previously run dedicated maths art enrichment in two different ways: as a stand-alone week-long course during ‘Enrichment Week’ at the end of the Summer term; and as a series of transition lessons for new intake classes when they've come up in June, or while they’ve been working in tutor groups before being set in September. Both have worked really well, and I’ll go into a bit of detail about them here.
I’ve previously run dedicated maths art enrichment in two different ways: as a stand-alone week-long course during ‘Enrichment Week’ at the end of the Summer term; and as a series of transition lessons for new intake classes when they've come up in June, or while they’ve been working in tutor groups before being set in September. Both have worked really well, and I’ll go into a bit of detail about them here.
Enrichment Weeks
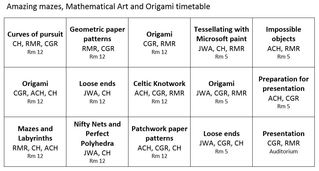
I was in my second year of teaching (i.e. still bright-eyed and bushy-tailed) when I first proposed running a Mathematical Art option for our school’s annual Enrichment Week. There were several week-long school trips on offer, and alongside these we needed in-school courses for those students who had opted not to go on trips.
We taught 100 minute lessons and kept to the same structure for the enrichment week, so I put together a timetable based around three daily 100 minute sessions for each of the different types of activity, interspersed with a couple of 'loose ends' sessions so that students could finish and mount their pieces or work independently with a newly learned technique of their choice.
Most of these activities are available on the Mathematical Art Lessons page. In addition I used Liz Meenan's resource for 'Patchwork Paper Patterns', this resource from Questgarden.com for 'Tessellating with Microsoft Paint' and origami instructions from Origami-fun.com. We were given a small budget which I used mainly for printing (the origami instructions, and the nets and curves of pursuit templates) and for purchasing brightly coloured paper and glue sticks. I also bought some sweets for daily prizes. I set up the classroom with tables in groups and a permanent resources area with scissors, glue sticks, pencils and coloured pencils, pairs of compasses, rulers, piles of paper etc. It was easier to have it all out at once, and it was always quickly tidied up by students at the end of each day.
I have to confess that we didn't have very many students sign up to the first one - and, to be honest, most of these were students who'd handed in their forms too late to get their first choices! So a rather grumpy-looking, motley assortment of students turned up on day one, convinced they'd been conned into doing 'extra maths' instead of, say, archery...
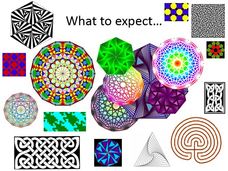
| Undeterred (outwardly, at least) I introduced the session with this presentation, which you are welcome to amend for your own purposes. Thankfully they all perked up a bit. And over the course of the week everyone got stuck in, really enjoyed themselves, and some of the most unlikely of characters produced absolutely stunning pieces of work. |
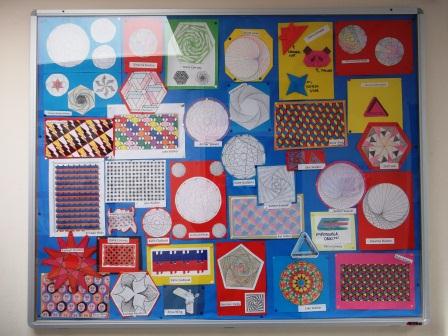
The week culminated with an assembly at which students presented what they had done during the various enrichment sessions. We had taken several photos throughout the week for this purpose. Students also took responsibility for mounting and presenting their work in two displays along the Maths corridor. End result: a very proud bunch of students :)
And I'm happy to report that in the following years several students actually signed up to Maths Art as their first choice session!
Transition activities
These lessons are fundamentally different from a stand-alone enrichment course as you will need to prepare resources for a whole cohort of students, to be used in lessons led by several different teachers. When I have done this before I've made sure to get the printing started a good week in advance, and have then organised all resources into packs for each classroom teacher, clearly labelled for each lesson. You will also need to check that each classroom has a sufficient supply of any required equipment.
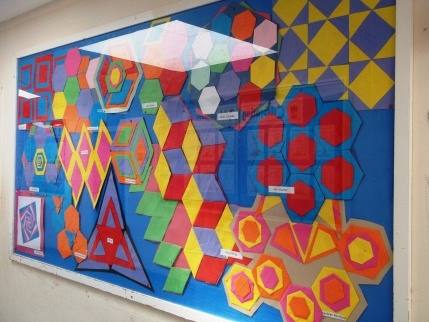
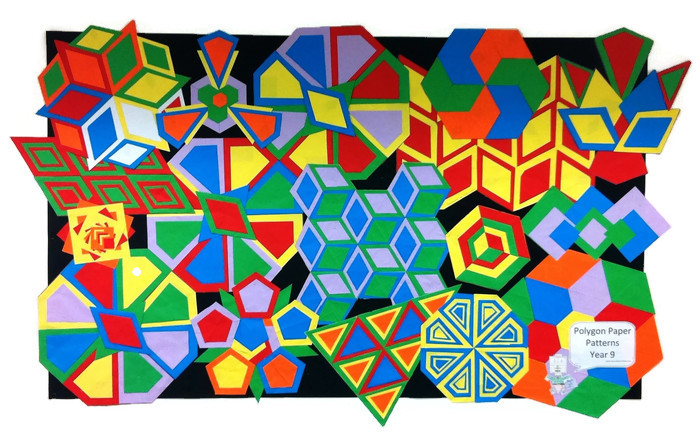
In terms of planning what activities to use, a good rule of thumb is that one activity is suitable for one or two 50 minute lessons, but no longer than that. Year 6s and 7s can access most of the activities - the only one I'd be wary of using is the Celtic Knotwork lesson, as this can sometimes require a certain amount of one-to-one assistance. Lessons I've used with great success in the past have been Curves of Pursuit, Insect Symmetry, Mazes and Labyrinths, and Patchwork Paper Patterns. This striking display, which greets all visitors to our Maths Department, is the result of a Year 9 new intake activity (we were a 13-18 school at the time):
In terms of planning what activities to use, a good rule of thumb is that one activity is suitable for one or two 50 minute lessons, but no longer than that. Year 6s and 7s can access most of the activities - the only one I'd be wary of using is the Celtic Knotwork lesson, as this can sometimes require a certain amount of one-to-one assistance. Lessons I've used with great success in the past have been Curves of Pursuit, Insect Symmetry, Mazes and Labyrinths, and Patchwork Paper Patterns. This striking display, which greets all visitors to our Maths Department, is the result of a Year 9 new intake activity (we were a 13-18 school at the time):
Finally, you will need to ensure all teachers are familiar with the techniques required for the lessons you have chosen - cue a really fun department meeting!
I do hope you've been inspired to run your own mathematical art enrichment in some form. For me the most wonderful thing about it is when those certain students who may have really struggled with maths in the past, or been entirely disengaged with the subject, come alive and completely surprise you with their creativity and resilience.
If you have any questions do contact me here or in the comments below.
If you have any questions do contact me here or in the comments below.
 RSS Feed

